The
sample iPad app we'll create will let the user create some on-screen
graphics using a handful of tools, similar to what you might see in a
vector-drawing application like Adobe Illustrator. We'll call it Dudel.
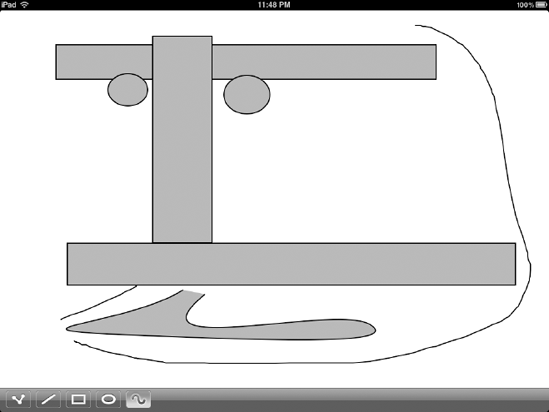
See Figure 1 for a glimpse of Dudel in action.
Apart from showing the use of
Bézier paths, this application will serve as the foundation for
demonstrating other technologies throughout the book. We'll add one
piece at a time as we work through the book, evolving and improving the
app as we introduce new features. This means that in this article,
we'll need to do a bit of project setup before we get to the actual
Bézier paths. Please bear with me—it's going to be worth the wait!
1. Creating the Dudel Project
Launch Xcode, and use the menu
or Xcode's friendly startup panel to create a new project. Select
iPhone OS Application in the upper left, which will bring up the
familiar set of application templates in the main section. Here, you'll
see a few changes compared to older SDKs.
Click around to explore
the various application templates. You'll see that each shows a product
type in the center of the window. Some project types are only for the
iPhone or only for the iPad; for those, the product type (iPhone or
iPad) is displayed in a label. Other project types can apply to either
platform; for those, you get a popup menu that lets you choose iPhone,
iPad, or Universal (to support both).
For our project, pick the
View-based Application template, select iPad from the product menu, and
click the Choose... button. Tell the familiar save panel where you want
to save this new project, and name it Dudel.
Xcode will make a new project for you, containing .h and .m files for the DudelAppDelegate and DudelViewController
classes. These contain the exact same sort of boilerplate code that you
would typically find in an iPhone project. You'll also see that the
project has a Resources-iPad directory, which contains the same kind of
Interface Builder files you're used to seeing in iPhone projects: MainWindow.xib and DudelViewController.xib. The main difference is that these files are set up for iPad, with windows and views that are already iPad-sized.
The default DudelViewController.xib file contains a top-level UIView
instance, but we're going to make our own view subclass, capable of
drawing all the shapes a user creates in the app. In Xcode, add a new
class to your project by right-clicking the folder where the new class
should be added (the Classes folder is the classic choice) and choosing
Add => New File
from the context menu. In the assistant that appears, choose Cocoa
Touch Class from the iPhone section, use the pop-up menu to make it a
subclass of UIView, and then click Next. Name the file DudelView.m, hit Finish, and a basic view class will be created for you.
Now, this view that does all
the drawing is sure to have some complexity. Obviously, it will need to
have some sort of interaction with the controller class. So let's do
this the standard Cocoa way, and define a delegate
outlet for connecting to the controller class. We'll also take the step
of defining a protocol for this delegate. The protocol won't have any
methods yet. We will add those after we figure out what sort of things
we need to delegate! For now, make sure your DudelView.h looks like this (the lines in bold are the ones you need to add to the template-generated header file):
// DudelView.h
#import <UIKit/UIKit.h>

@protocol DudelViewDelegate
@end

@interface DudelView : UIView {
  IBOutlet id <DudelViewDelegate> delegate;
}
@end
That defines just enough for us
to be able to hook it up in Interface Builder. Now we will continue to
pull together the rest of the pieces for the nib-based portion of the
app. Later on, we'll go back and implement the view itself.
The source code archive
accompanying this book includes a set of buttons meant for use in
Dudel. If you don't have the archive at hand, use your favorite
graphics editor (I'm partial to GIMP) to create buttons similar to what
you see in Table 1.
They don't need to be pixel-perfect, but should be roughly similar so
that your version of the app looks and feels about the same as mine.
The button images shown here are 46 by 32, and you should try to stick
to a similar size.
Table 1. Buttons for the Main Dudel View
| Filename | Image |
|---|
| button_bezier.png |  |
| button_bezier_selected.png |  |
| button_cdots.png |  |
| button_cdots_selected.png |  |
| button_ellipse.png |  |
| button_ellipse_selected.png |  |
| button_line.png |  |
| button_line_selected.png |  |
| button_rectangle.png |  |
| button_rectangle_selected.png |  |
NOTE
If you're making your own button images, keep in mind the way that UIToolbar
renders its button images. Rather than drawing their content directly,
it uses the brightness as a sort of transparency mask. White areas are
completely transparent (letting the UIToolbar itself show through), black areas show up as a solid color that contrasts well against the UIToolbar's
background color (e.g., black on a light-gray background or white on a
dark-gray background), and all gray values are treated somewhere in
between. In the graphics supplied for this example, the "normal" images
for each button are mostly completely transparent, with just a border
and the contained symbol, and the "selected" images have a gradient
background to make them stand out clearly.
Drag all of the button
image files into the Resources-iPad folder in your Xcode project. Be
sure to check the Copy items into destination group's folder check box
before clicking the Add button. Once those images are in place, they'll
be ready to use within your application code and nib files.
Next, we need to define the
interface for our controller. For now, we just want to set up enough to
allow us to hook up the few components we need in the nib file.
As you saw in Figure 1, Dudel will contain a row of buttons that let the user select a drawing tool. These buttons are actually instances of UIBarButtonItem, which will be placed on a UIToolbar.
We'll need to have an outlet for each button so that we can control its
appearance, and we'll need an action for each button to trigger, all of
which will be set up in Interface Builder. We'll also create an outlet
to point at a DudelView instance,
which will be initialized when the nib file is loaded. Last but not
least, we'll declare our class to conform with the DudelViewDelegate protocol, so that Interface Builder will let us hook it up.
Open DudelViewController.h and add the code shown in bold.
// DudelViewController.h
#import <UIKit/UIKit.h>
#import "DudelView.h"

@interface DudelViewController : UIViewController <DudelViewDelegate> {
  IBOutlet DudelView *dudelView;
  IBOutlet UIBarButtonItem *freehandButton;
  IBOutlet UIBarButtonItem *ellipseButton;
  IBOutlet UIBarButtonItem *rectangleButton;
  IBOutlet UIBarButtonItem *lineButton;
  IBOutlet UIBarButtonItem *pencilButton;
}
- (IBAction)touchFreehandItem:(id)sender;
- (IBAction)touchEllipseItem:(id)sender;
- (IBAction)touchRectangleItem:(id)sender;
- (IBAction)touchLineItem:(id)sender;
- (IBAction)touchPencilItem:(id)sender;
@end
For the sake of having an
app that we're able to build without errors at any time, let's go ahead
and add some minimal implementations of those action methods to DudelViewController.m. They won't have any functionality yet, but their presence will let the compiler compile this class without complaint.
// DudelViewController.m
#import "DudelViewController.h"

@implementation DudelViewController

- (IBAction)touchFreehandItem:(id)sender {}
- (IBAction)touchEllipseItem:(id)sender {}
- (IBAction)touchRectangleItem:(id)sender {}
- (IBAction)touchLineItem:(id)sender {}
- (IBAction)touchPencilItem:(id)sender {}

// skipping the boilerplate code that's part of the template
// [...]

@end
We'll add more to this class later on, but this is all we need to create and hook up the GUI in Interface Builder.